Introduction
Singularity container lets user run applications in a Linux environment of their choice. It encapsulates the operating system and the application stack into a single image file. One can modify, copy and transfer this file to any system has Singularity installed and run as a user application by integrating the system native resources such as infiniband network, GPU/accelerators, and resource manager with the container. Singularity literally enables BYOE (Bring-Your-Own-Environment) computing in the multi-tenant and shared HPC cluster.
Workflow
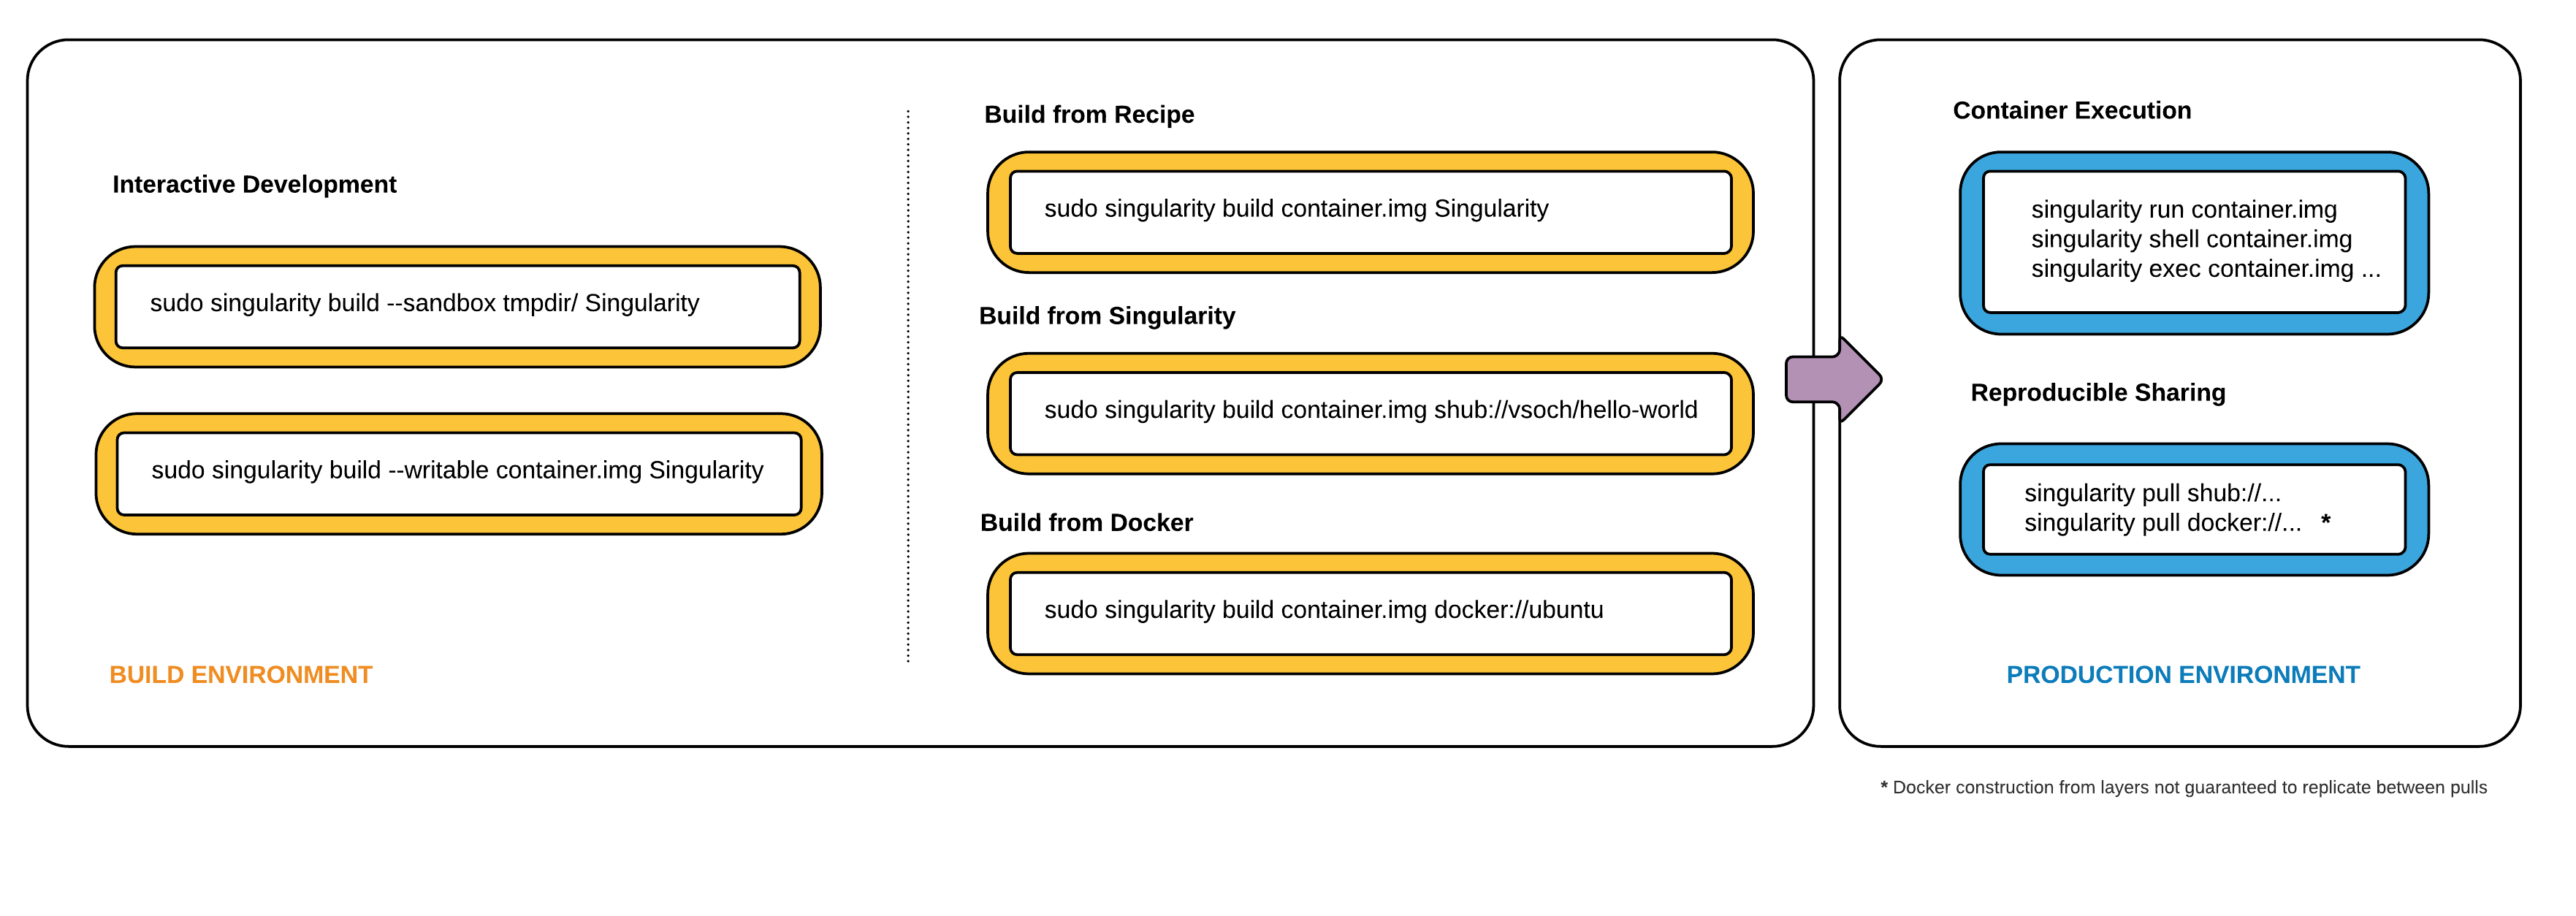
The above figure from official documentation describes the typical workflow to use Singularity. In general, there are 2 stages in the workflow: build container in user endpoint and execute container in production environment. Typically, user endpoint refers to local systems where you have admin/root privilege, e.g, your desktop/virtual machine, while production environment refers to shared environment where you only have user privilege, e.g, hpc2 cluster.
In the first stage, you need to build a customized container by installing applications and modifying configuration if applicable. With the prepared container image, you can upload it to your home directory in the cluster to start stage 2. In this stage, you can treat the container as an application. Similar to other user application, you can submit job to execute the container in compute node via SLURM.
Stage 1:
To start with, one needs to be a root (super user) in a local system (Linux system or Linux VM, virtual machine, on Windows/Mac). Do the following in the local system:
- Install Singularity in the local system with the Quick Start Guide.
- There are multiple ways to build a container image. Below is an example of building a tensorflow-gpu container from docker.
singularity build --writable tensorflow-latest-gpu.img docker://tensorflow/tensorflow:latest-gpu
It builds a writable image in the current directory and you can update the container with other software and data if necessary. - Upload the container to the cluster to run.
Stage 2:
- Enable singularity environment in HPC2 by putting up below in your ~/.bash_profile and relogin to be effective.
source /usr/local/setup/singularity.sh
- Suppose you have downloaded the TensorFlow models to your home directory in HPC2 as below.
git clone https://github.com/tensorflow/models.git
- Test the container to train a model on the MNIST handwritten digit data set using a GPU node such as hnode-77.
singularity exec --nv tensorflow-latest-gpu.img python ./models/tutorials/image/mnist/convolutional.py
The "--nv" option allows the container to access the GPU devices in the node with the Nvidia driver installed.
To run jobs with SLURM, you can put the above statement in your SLURM job submission script. The sample job submission script hpc2_slurm_singularity.txt is available here.
Notes:
- 1. The latest tensorflow-gpu software package can also be installed from Anaconda as follows instead of using the singularity container.
conda install -c anaconda tensorflow-gpu
- 2. For stage 1, sample singularity recipe files can be found in this page.
- 3. Test your container before job submission. You can test it in interactive mode or batch mode. It is important to test if the container works as you expect, especially when your application utilizes GPU. For any test on using GPU, please login hnode-77 via SSH from the login node.